LAN内のPCが外部に抜けられない環境で、PCの時刻がズレてしまい課題となっていました。
LTEルータ化したラズパイを現地に設置し、NTPサーバを導入することで解決する手法を用いました。
その方法をまとめたので、以下に記載します。
「NTP」サーバの構築
「NTP」のインストール
時刻配信をするためには、「NTPパッケージ」の導入が必要になります。
最初にパッケージをインストールします。
$ sudo apt install ntp

Reading package lists... Done
Building dependency tree... Done
Reading state information... Done
The following additional packages will be installed:
  libevent-pthreads-2.1-7 libopts25 sntp
Suggested packages:
  ntp-doc
The following packages will be REMOVED:
  systemd-timesyncd
The following NEW packages will be installed:
  libevent-pthreads-2.1-7 libopts25 ntp sntp
0 upgraded, 4 newly installed, 1 to remove and 33 not upgraded.
Need to get 790 kB of archives.
After this operation, 1747 kB of additional disk space will be used.
Do you want to continue? [Y/n]
「Y」でインストールを続行します。
「npt.conf」を編集
インストールが完了したら、「ntp.conf」ファイルを編集します。
$ sudo nano /etc/ntp.conf書き込まれている「pool」行をコメントアウトし、日本のNTPサーバを追加します。
具体的には、「pool ntp.nict.jp iburst」「pool ntp.jst.mfeed.ad.jp iburs」という2行を追加します。
# Use servers from the NTP Pool Project. Approved by Ubuntu Technical Board
# on 2011-02-08 (LP: #104525). See http://www.pool.ntp.org/join.html for
# more information.
#pool 0.ubuntu.pool.ntp.org iburst
#pool 1.ubuntu.pool.ntp.org iburst
#pool 2.ubuntu.pool.ntp.org iburst
#pool 3.ubuntu.pool.ntp.org iburst
# 日本のNTPサーバを追加
pool ntp.nict.jp iburst
pool ntp.jst.mfeed.ad.jp iburs
また、このNTPサーバへのアクセスを許可するネットワーク範囲を追記します。
(今回の場合は、「192.168.0.X」のセグメントで利用するので以下のように記載します。)
# Clients from this (example!) subnet have unlimited access, but only if
# cryptographically authenticated.
#restrict 192.168.123.0 mask 255.255.255.0 notrust
restrict 192.168.0.0 mask 255.255.255.0 notrust
「NTP」サービスを有効化
続いて、ラズパイ起動時にも自動でサービスが起動するように「enable」をします。
$ sudo systemctl enable ntp.service「NTP」サービスを起動
実際にサービスを起動させます。
$ sudo systemctl start ntp.service「NTP」サービス起動状態を確認
$ sudo systemctl status ntp.service以下のように表示されればOKです。
$ sudo systemctl status ntp.service
● ntp.service - Network Time Service
     Loaded: loaded (/lib/systemd/system/ntp.service; enabled; vendor preset: enabled)
     Active: active (running) since Mon 2022-11-07 10:09:11 JST; 7min ago
       Docs: man:ntpd(8)
   Main PID: 6170 (ntpd)
      Tasks: 2 (limit: 4915)
     Memory: 944.0K
        CPU: 443ms
     CGroup: /system.slice/ntp.service
└─6170 /usr/sbin/ntpd -p /var/run/ntpd.pid -g -u 114:122NTP同期状態を確認
ステータスを確認して、「nict」のサーバに同期参照していればOKです。
$ sudo ntpq -p
     remote           refid      st t when poll reach   delay   offset  jitter
==============================================================================
 0.ubuntu.pool.n .POOL.          16 p    -   64    0    0.000   +0.000   0.002
 1.ubuntu.pool.n .POOL.          16 p    -   64    0    0.000   +0.000   0.002
 2.ubuntu.pool.n .POOL.          16 p    -   64    0    0.000   +0.000   0.002
 3.ubuntu.pool.n .POOL.          16 p    -   64    0    0.000   +0.000   0.002
 ntp.ubuntu.com  .POOL.          16 p    -   64    0    0.000   +0.000   0.002
*ntp-a2.nict.go. .NICT.           1 u   31   64  377   46.972   -4.306   6.033
・・・

 #「*」は「参照同期中」のNTPサーバ。
 #「+」は「クロック誤り検査に合格」したNTPサーバ
 #「  」は「サーバを参照していない」ことを表します。
続いて、Windows PCからラズパイを指定して同期してみます。
NTPサーバと同期してみる
「Windows PC」と同期
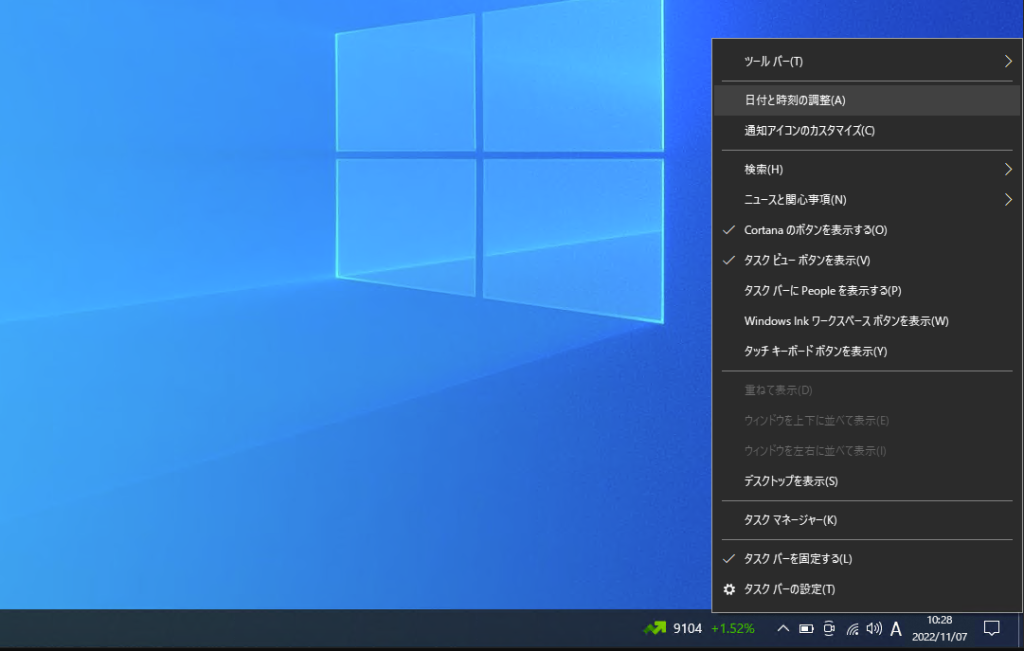
タスクバーの「日時」の部分を右クリックし、「日時と時刻の調整」をクリックします。
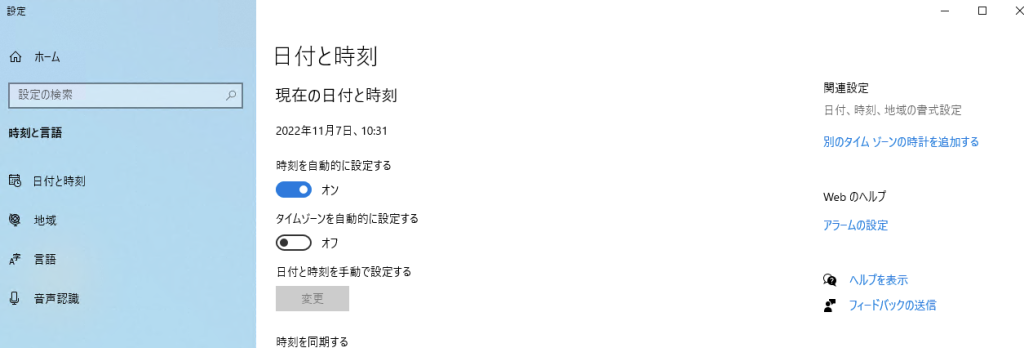
ウィンドウ右上の「別のタイムゾーンの時計を追加する」をクリックします。
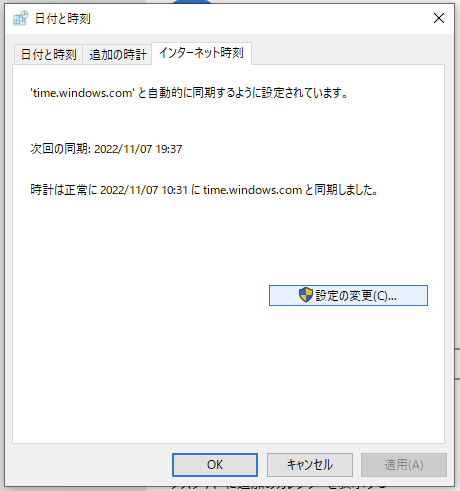
表示された「日付と時刻」のウィンドウで、「インターネット時刻」のタブを開きます。
「設定の変更」の項目があるので、クリックします。
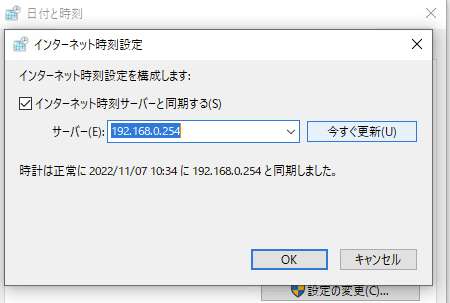
「インターネット時刻設定」のウィンドウが表示されます。
「サーバー」欄にラズパイのIPアドレスを入力して「今すぐ更新」をクリック。
サーバに同期できると、「時計は正常に 〇〇(日時)に〇〇(NTPサーバ名)と同期しました。」と表示されます。
ここまで表示されれば作業は完了です!