目次
「商品テンプレート」の作成
Shopifyの管理ページを開き、「オンラインストア」設定の「テーマ」を開きます。
使用しているテーマの「カスタマイズ」を開きます。

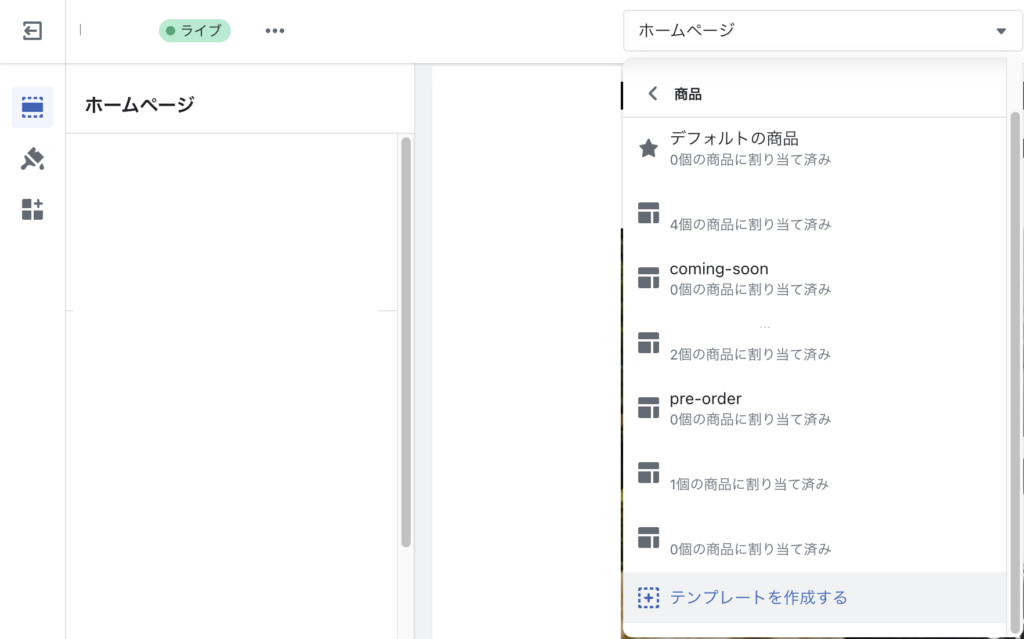
テーマのカスタマイズから「商品」を開き、「テンプレートを作成する」をクリックします。
クリックすると、テンプレートの「名前」とベースとなるテンプレートを選択する画面になるので、指定の上「テンプレートを作成する」をクリックします。
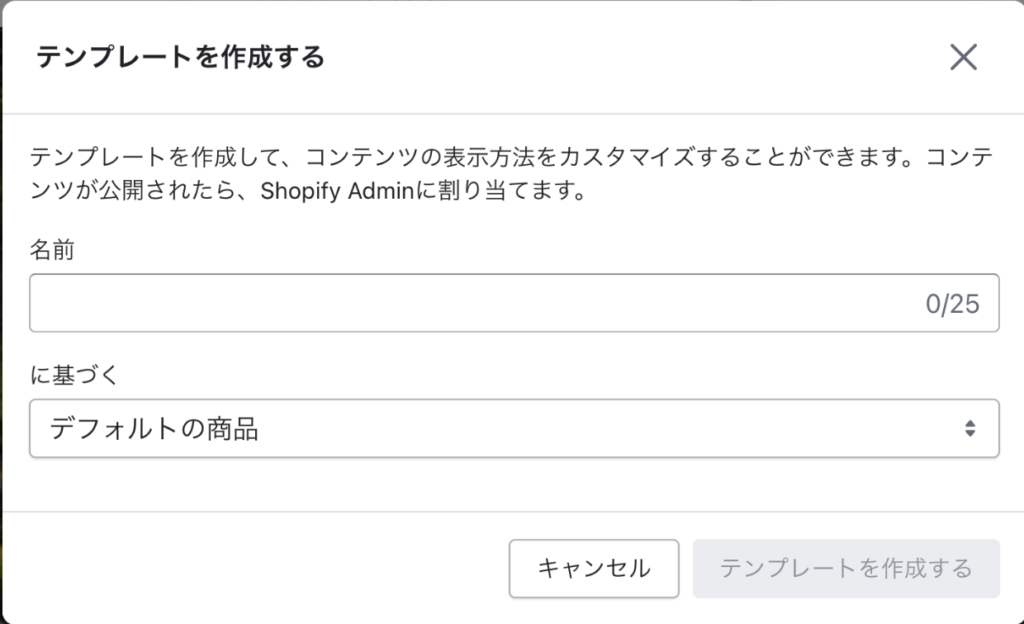
テンプレート名は後ほど設定に使用するため覚えておいてください。
「theme.liquid」ファイルを編集
再度、Shopifyの管理ページから、「オンラインストア」設定の「テーマ」を開き、「コードを編集」をクリックします。
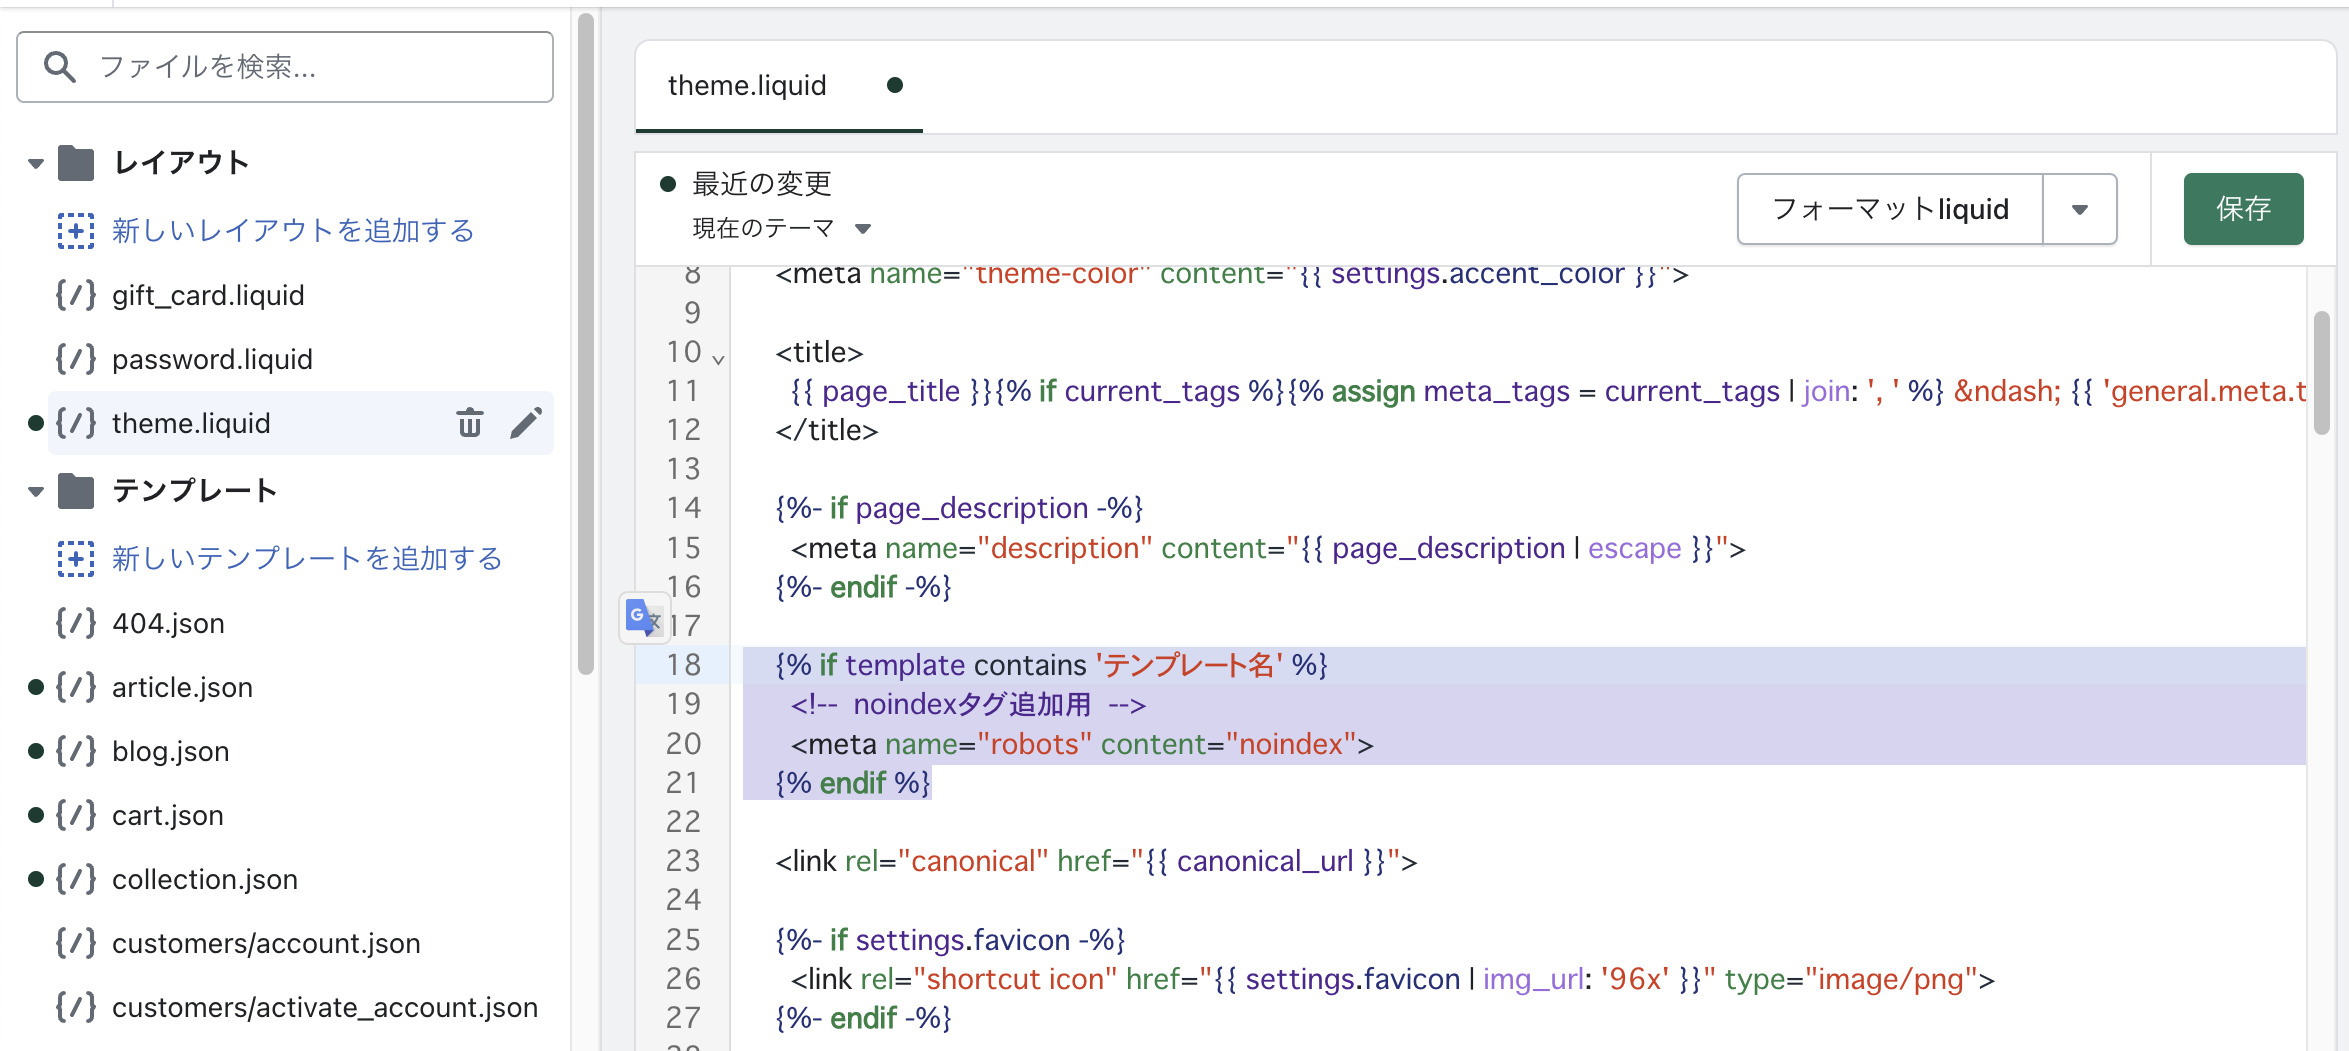
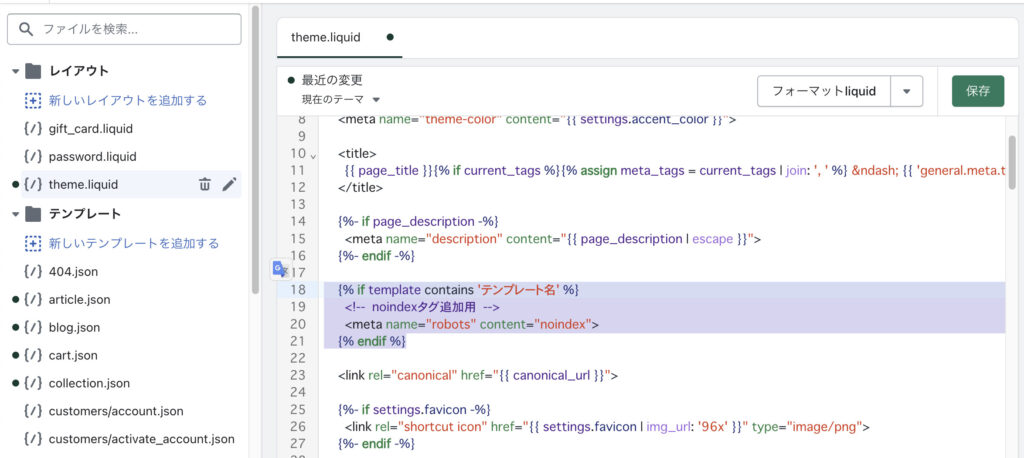
「theme.liquid」を開き、以下の「metaタグ」を任意の場所に追記します。
{% if template contains 'テンプレート名' %}
  <meta name="robots" content="noindex">
{% endif %}追加した際のイメージは以下の通りです。
「商品テンプレート」を適用
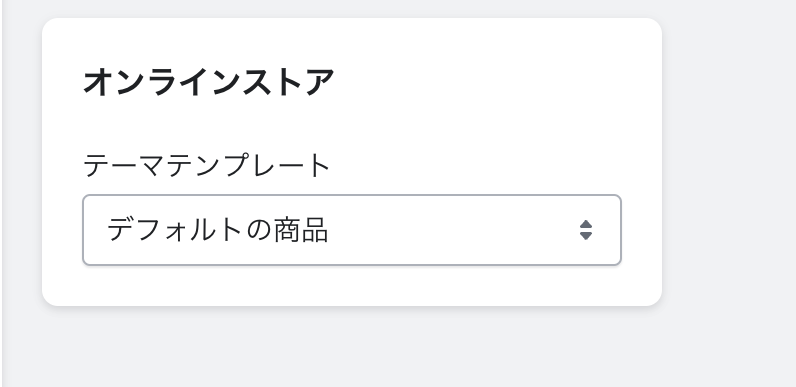
最後に、商品に作成したテンプレートを適用します。
「商品管理」から対象の商品の編集ページを開き、画面右下の「テーマテンプレート」の欄の項目を、作成したテンプレートに指定します。
以上で商品ページを「no index」させることができます!
